
Jeremy has been a student at the School of Woodwork for a while and has gone through some early learning steps many new woodworkers face. We asked him to share his journey thus far.
Humble beginnings.
I took the Introduction to Woodworking course at the Florida School of Woodwork and immediately fell in love with woodworking. The experience of taking raw wood and creating something beautiful was immensely gratifying, and I couldn’t wait to get home and start on all the fabulous projects I conjured up in my head during that first week in the shop.
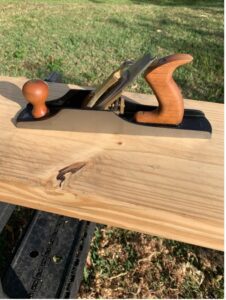
About mid-week through that first class, with much enthusiasm, I ordered a new Lie Nielson #5 hand plane. If building beautiful things with machines was that gratifying, I reasoned, using hand tools must be the gold standard of achievement!
My new hand plane arrived about a week after the class ended. It was the first real woodworking tool I’d ever owned, and it was gorgeous! I don’t really know what I thought I was going to accomplish, with the extent of my kit being one Jack Plane that I’d never before used, but that Saturday, I set off for the lumber yard to purchase some wood. I purchased two boards: one section of 4/4 White Oak and one of 6/4 Cherry. I couldn’t wait to get home and get to work!
I live in an old house in a downtown neighbourhood. We don’t have a garage or even a shed, much less a workshop, but I had a truck at the time and remembered the many times before in carpentry dropping the tailgate and using it as a workbench. And this is exactly what I did to set up my hand plane operation. So, with my shiny new hand plane and my brilliant workbench, I set out to transform these rough pieces of wood into the yet-to-be-determined pieces of art I knew they could be…… right!?!
Early Lessons
New lessons were learned very quickly.
- Tailgates with bed liners are incredibly slippery and don’t hold a workpiece at all,
- Hand planning outside in Florida (even in March) is a lot of work,
- If not done correctly, taking small shavings can quickly make the situation much worse than when you started!
I really didn’t expect things to work out perfectly the first time. I knew my initial expectations were highly unrealistic, but my first attempt at woodworking at home was more than a little deflating.
It’s been almost three years, and I have just now finished my first project at home! There were certainly many things that contributed to this timeline. I work full time, and it’s been a busy few years, I needed to purchase more woodworking tools (which cost money!), and I needed to figure out how to set up a workspace.
I’ve not got a 100% portable set-up that includes two old plastic sawhorses and a 12-foot long 2×12 yellow pine board (purchased at Lowe’s for less than $20) cut in half.
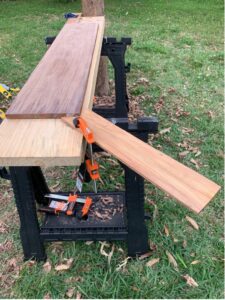
I surfaced all sides of the resulting 6-foot long boards (one of which I did 100% with hand tools!) and originally planned to glue them together to make a thick workbench. But, after working with the setup for a few months, I don’t think I need to do anything further. I like the flexibility of being able to lay the boards side by side to hold my benchtop power tools and for glue-ups, and to stack them on top of one another to create a more solid surface for hand planning. And being able to carry one 24-pound board at a time is a lot less work than lugging one 48-pound solid workbench.
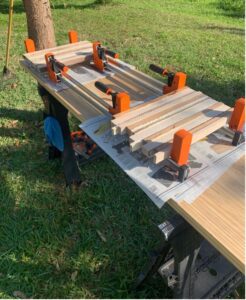 The sawhorses are both light and durable, and most importantly, I can leave them outside. They even have 1 ½” wide slots on each side (intended for carpenters to be able to secure 2x materials on their side) into which I can insert a 2×4 as a planning stop for the workbench (after thicknessing the 2×12’s, they are about 3/8” thinner than a 2×4 placed on its side, which creates a nice plaining stop).
We have a wonderful mango tree in our backyard that provides great shade throughout the day, as well as a very solid backstop for my portable workbench. I do need to put a towel between the end of the workbench and the tree trunk so I don’t damage it, but overall, it is a very peaceful place to work.
I enjoy hand tool work and have devoted a considerable portion of my tool purchase budget to buying hand tools. I have more of them than I would need, but it’s been a personal choice to add to my collection. I highly recommend the Introduction to Hand Tools and Joinery course here at the Florida School of Woodworking for anyone interested in hand tool usage. This course is packed with information, and the sharpening portion has transformed my experience with hand tools from a mild workout to pure Zen!
Power Tools
I’ve also purchased some benchtop power tools when they’re on sale and learnt how to set them up properly. The power tools I use the most are a:
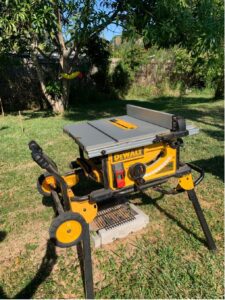
- DeWalt Contractors Table Saw. The table saw is super convenient because it has an attached wheeled stand that makes it very easy for me to transport from the small closet in my lanai to my outdoor workspace. This model will also accept a dado blade. It’s a great saw.
 DeWalt Benchtop thickness planer. The thickness planer is difficult to move around. It weighs about 90 pounds and is challenging for one person to move. I store it on a shelf in the closet that is waist high and set up the workbench before I retrieve it to set it up. This saves me from having to lift the weight from ground level. It took me about two hours to hand plane one of the six-foot sections of my workbench. The same task took about 10 minutes with the planner! It is deafening, and I try to use it sparingly.
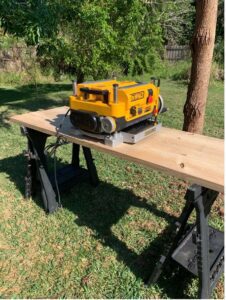 Benchtop Jointer. I will do just about anything to avoid using it. Anyone taking a class at the School will likely hear Andrew Gibson advise that “every machine (and tool) has a personality”. Well, my jointer flat out has an attitude problem! It requires constant adjustment and produces inconsistent results, and with hand tools and some creative use of the planner, I’ve found other ways to accomplish my small tasks without it. For me, it simply takes more effort to include (this) jointer in my workflow than not to.
My Woodworking Path
I continue taking courses at the Florida School of Woodwork and thoroughly enjoy spending a week working in a professional shop. But I’m also learning to properly refine my workflow and expectations for projects I build at home in my backyard, using scaled versions of a small subset of the numerous tools available for woodworking. I’ve learned to enjoy each experience for what it is, whether building something completely new with highly tuned machines (in an air-conditioned workshop!) or enjoying the gentle breeze in the solitude of my backyard, working totally at my own pace with only my thoughts to keep me company.
I think the biggest thing I’ve learned over the past three years is that the gap between starting with nothing and having the ideal setup doesn’t have to be nearly as wide as it first seems. There will always be a “more ideal” setup, but it only takes a basic set of small tools that can be set up and used on an inexpensive piece of lumber placed on cheap sawhorses to start shaping raw unfinished wood into beautiful objects.
My advice to anyone just starting out, is to try not to get overwhelmed! I assure you it’s easier to get started than it may seem, and there’s plenty of help and great advice available. You really don’t have to buy every tool available or even have a dedicated workspace to start experiencing the satisfaction of woodworking.
Good luck, and enjoy the journey!
From under the Mango Tree,
Jeremy
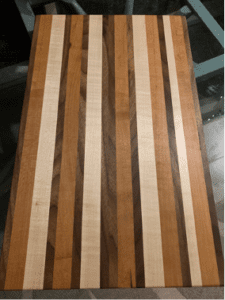
P.S. My first completed project at home was a cutting board. I know in the woodworking world, this is a very basic project and one of the first things many of us build. But the experience of buying the raw wood, milling it to thickness, cutting it into strips, glueing it up and then hand planning the final surface in my portable outside workshop totally on my own was highly gratifying, and I think I’m prouder of this very basic project than anything else I’ve built to date!