
How To Make a Federal Period Oval Fan Inlay Using Veneers
By Joe Kunzman
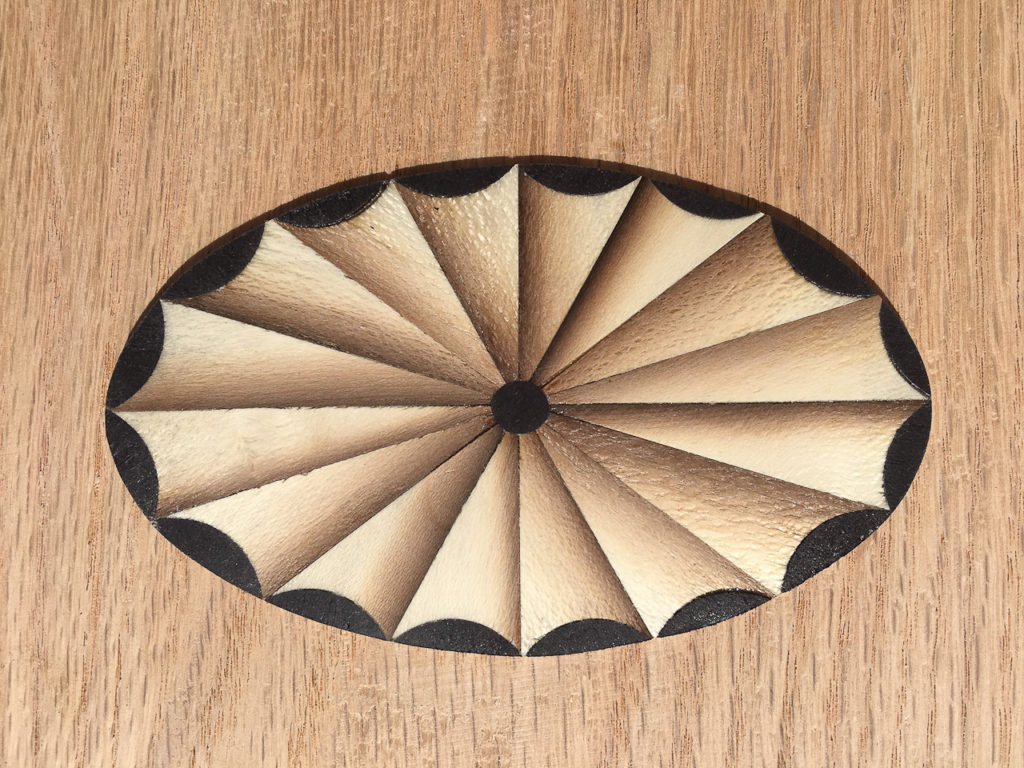
Federal Period furniture pieces are often adorned with a paterae ( click here to see wikipedia definition of Paterae) such as this 16-segment oval fan.
Here we’ll show you how to make one. There are four steps in the process they include:
- Cutting the Inlay Field
- Cutting & Attaching the Thumbnails
- Attaching the Fan Inlay Background
- Cutting out the Oval Shape
The tools and materials you will need to complete this are:
- Sand
- Veneer tape
- Three constrasting veneers
- Angle cutting jig
- 220 sandpaper
- #9/7 gouge or hole punch
- Hide glue
Note: If you would like to learn more about inlay and veneer work please check out the classes at the Florida School of Woodwork.
How to Make the Inlay Field
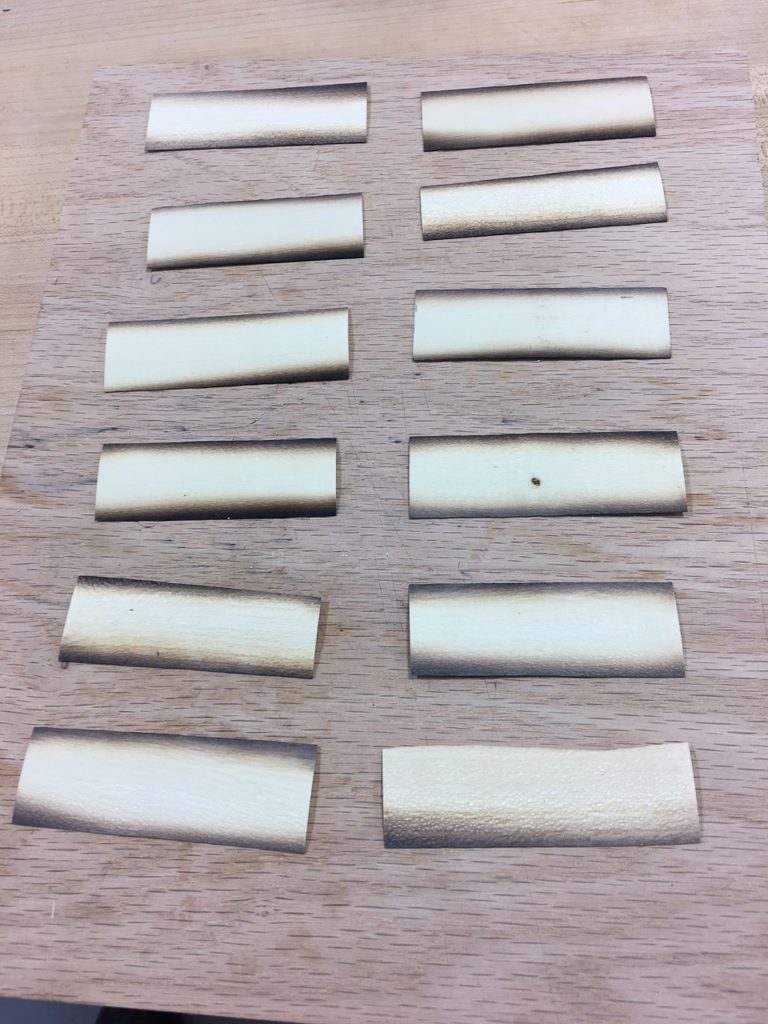
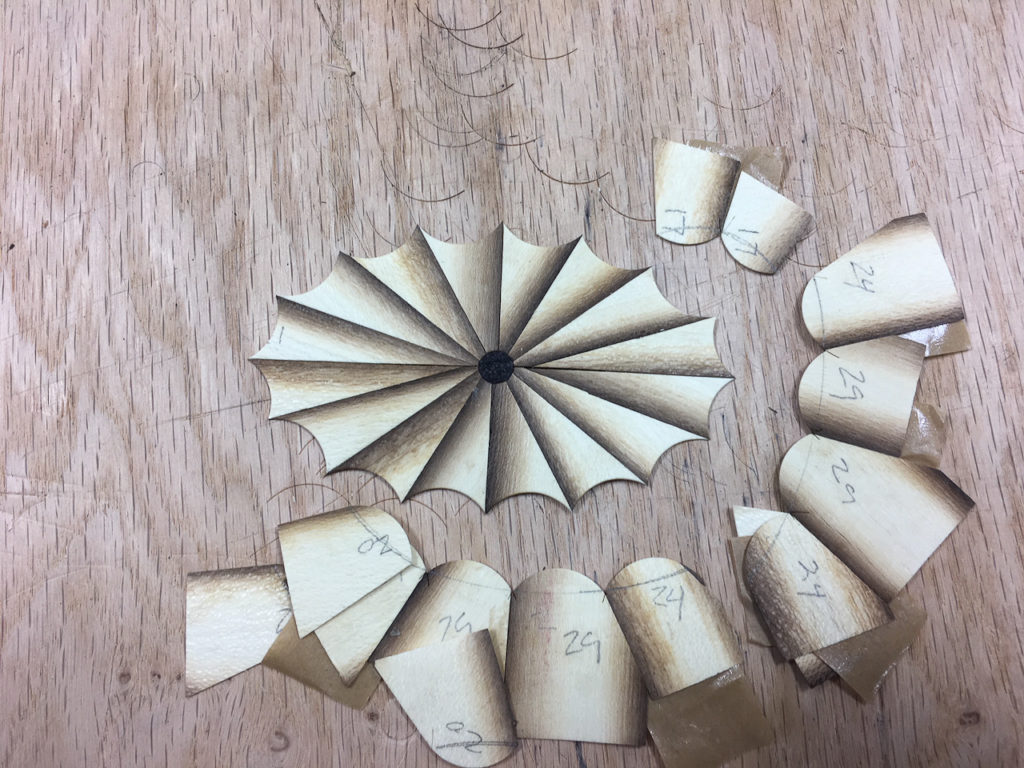
Start by cutting pieces of holly veneer into 1” wide by 2.5” long rectangles; with the grain running the lengthwise. The length selected is slightly over the dimension of the longest radius of the oval template being used. For our 16-segment oval, 8 rectangular pieces will be required as each rectangle yields 2 pie-shaped wedges. Make extras in the event of defects in the veneer or shading variances.
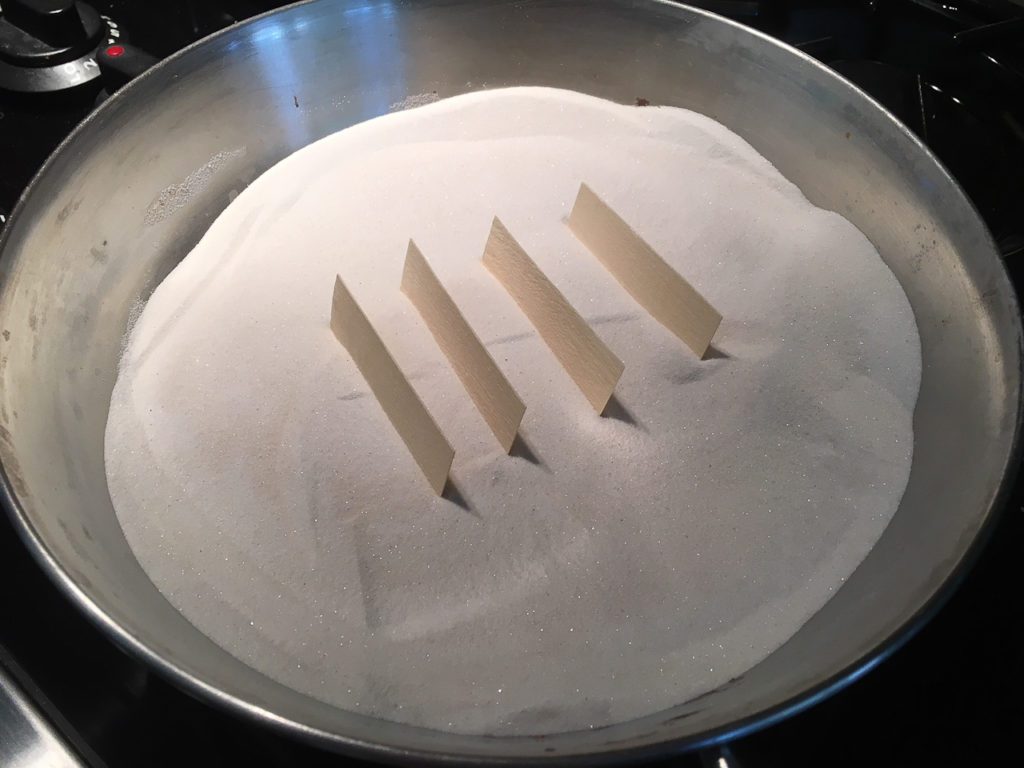
How to Sand Shade
Sand shade both long sides using fine uncolored sand from a hobby store, not off the beach. I used a conventional skillet on the gas kitchen stove set to low. At temp, each piece requires only a couple of minutes to darken. After shading, trim off any burned or uneven edges. Lightly sand the edges flat.
Traditionally, oval fan inlays are laid out such that the perimeter width of all segments are approximately equal. Because an oval is elongated (compared to a circle), the angle of each segment will vary.
This 16-segment oval will have 4 segments per quadrant. Starting at the longest radius and running to the shortest radius, the angles are: 17, 20, 24, and 29 degrees. Here are the recommended angles and layout for this pie fan inlay

How To cut the Pie Segments in an Inlay Fan
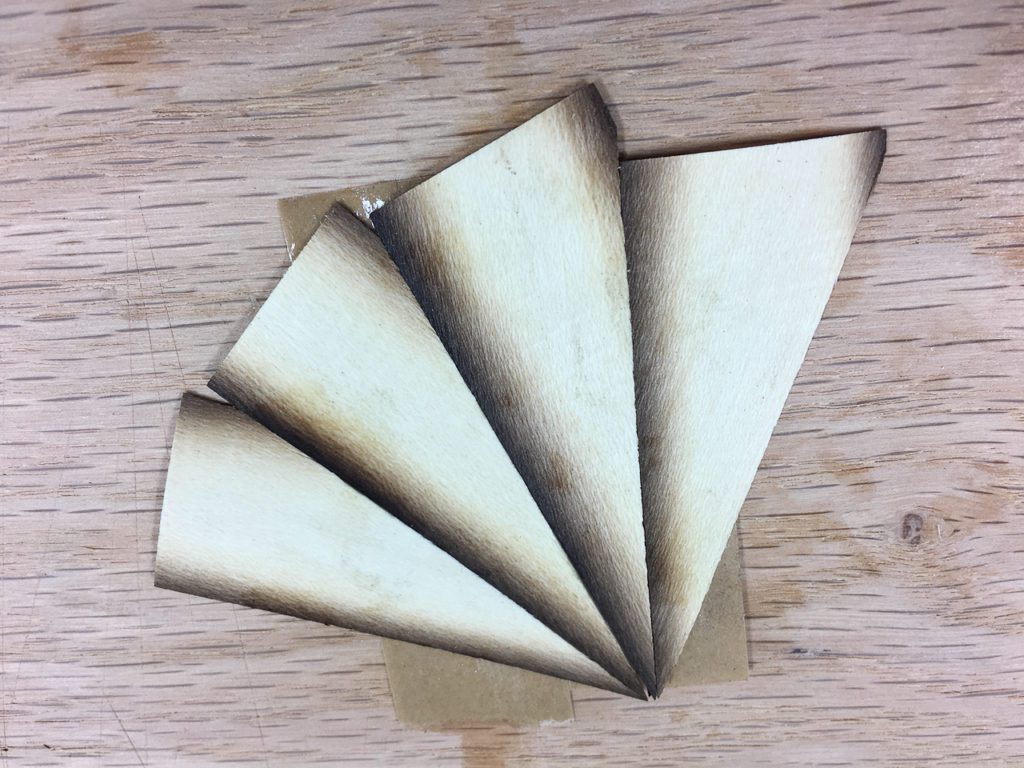
Cut the pie shaped segments using an angle jig. Important: Cut both sides; don’t assume the edges of the veneer stock are parallel. Make a stack for each angle.

Assembling the Quadrants
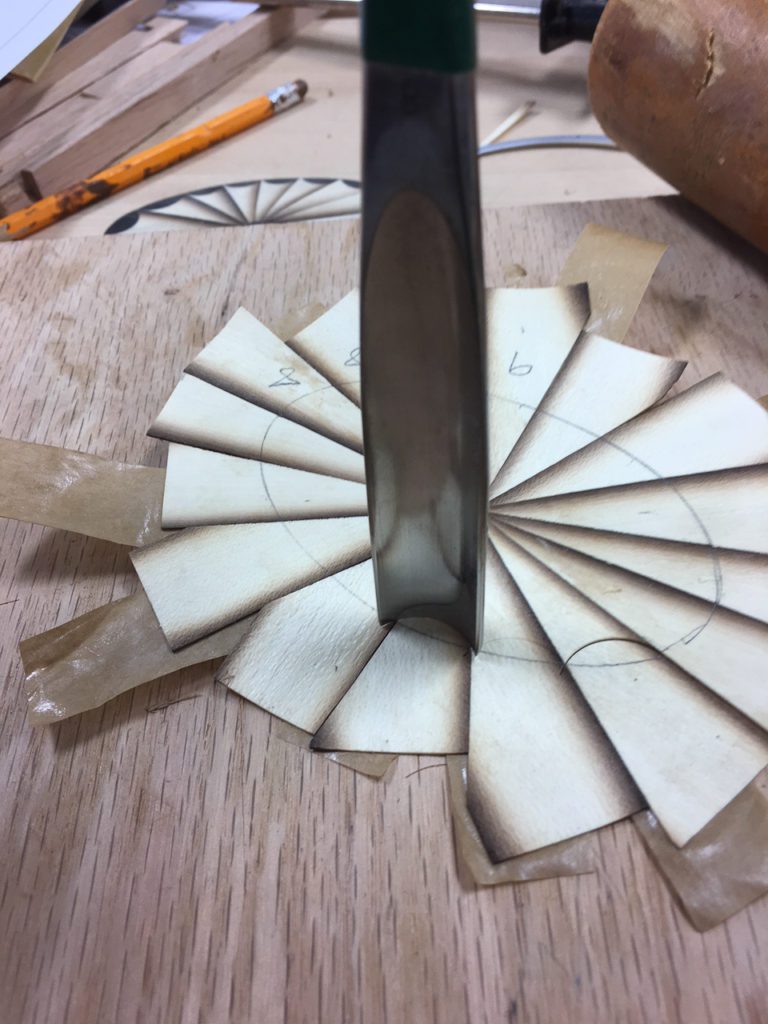
Assemble each quadrant with veneer tape using one segment of each angle. Two quadrants will be left-handed the other two will be right handed. After assembling each quadrant, lay them out and make sure the shading is on the correct side.
Clamp between two pieces of wood and set aside to dry (wet tape is hard to trim). Then, trim off any tape from the edges. Also, check that each quadrant is 90°. Trim the unshaded edge, if necessary.
- Assemble the quadrants into halves using veneer tape. Trim each edge of each half with a straight edge. Finally, assemble both halves together to form a complete unit.
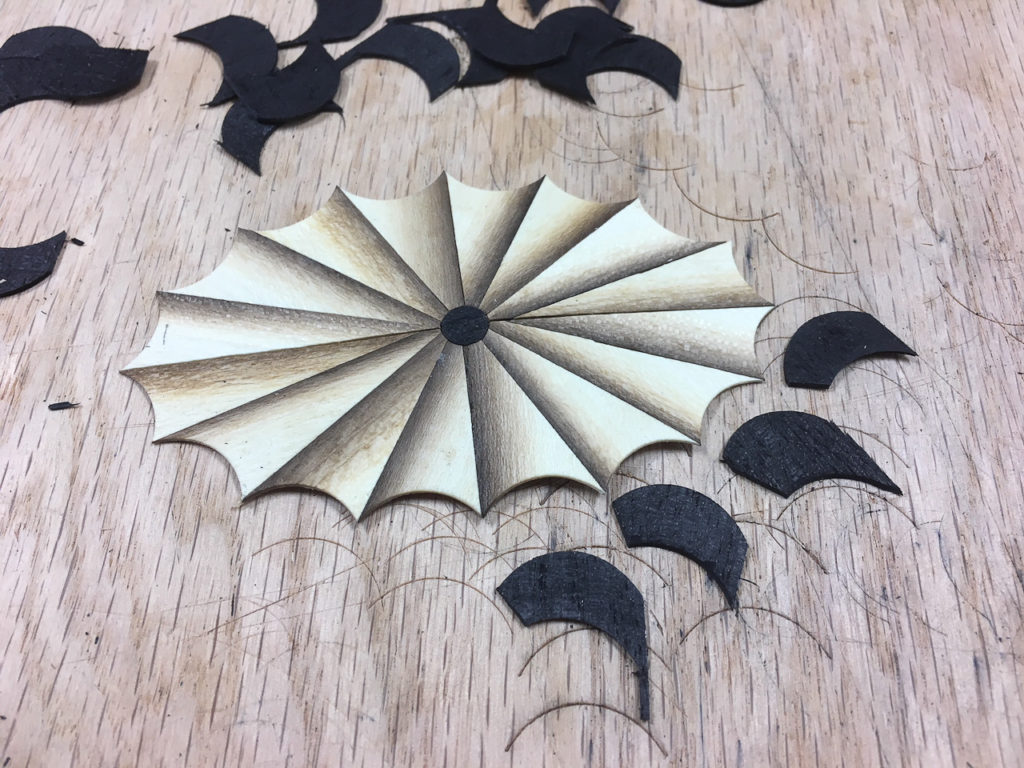
Cut out a circle/oval in the center of the paterae with a #9/7 gouge or hole punch.
Make an equal size/shape plug from dyed black veneer. Secure with veneer tape. Clamp between two pieces of wood and set aside to dry.
Using an oval template, draw an oval onto the assembly.
With the #8 gouge, cut-out scallops at the ends of each segment for the background.
Align the edge of the gouge with the two point where the edges of the segment intersects the oval pencil line.
Cut 3/4-inch strips of black veneer (the width of a #8 gouge) for the background.
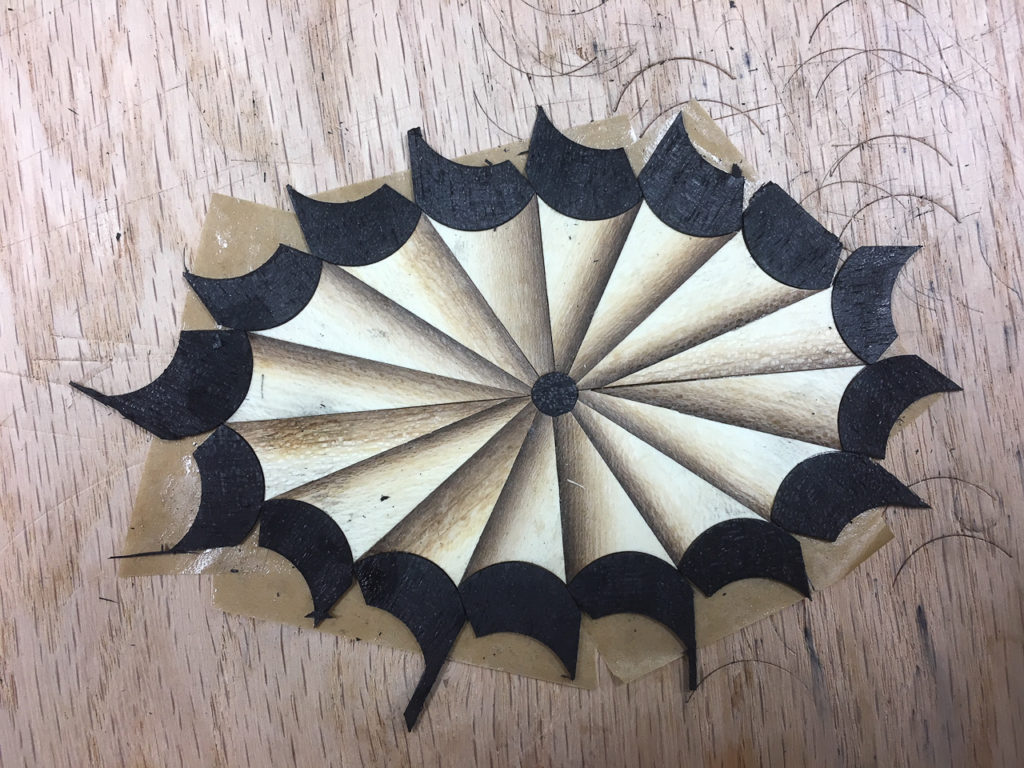
Using the same #8 gouge, cut out thumbnails to fit the scallops cut in the preceding step.
To make fitting the thumbnails easier, cut-off one side of the thumbnail as shown.
How To Make & Attach the Thumbnails Of a Fan Inlay
Cut 3/4-inch strips of black veneer (the width of a #8 gouge) for the background.
Using the same #8 gouge, cut out thumbnails to fit the scallops cut in the preceding step.
To make fitting the thumbnails easier, cut-off one side of the thumbnail as shown.
Using veneer tape on the back of the piece, fill each scallop (made in step 2) with a thumbnail (made in step 3) to form a background around the field. Tightly position the thumbnails to the field. Don’t worry if there is a gap between the thumbnails as this will be cut away in a later step.
Attaching the Backing Veneer to A Fan Inlay
- Prepare hide glue and cut out a piece of backer veneer
- Apply hide glue to the exposed side of the assembly and attached to backer veneer. Cover in aluminum foil and clamp between two blocks of wood until cool (about 20 minutes). Wet veneer tape and remove it. Clamp overnight to fully dry (otherwise it will severely curl).
How to Form the Oval of Fan Inlay
- Center oval template on paterae and draw oval outline with a white pencil.
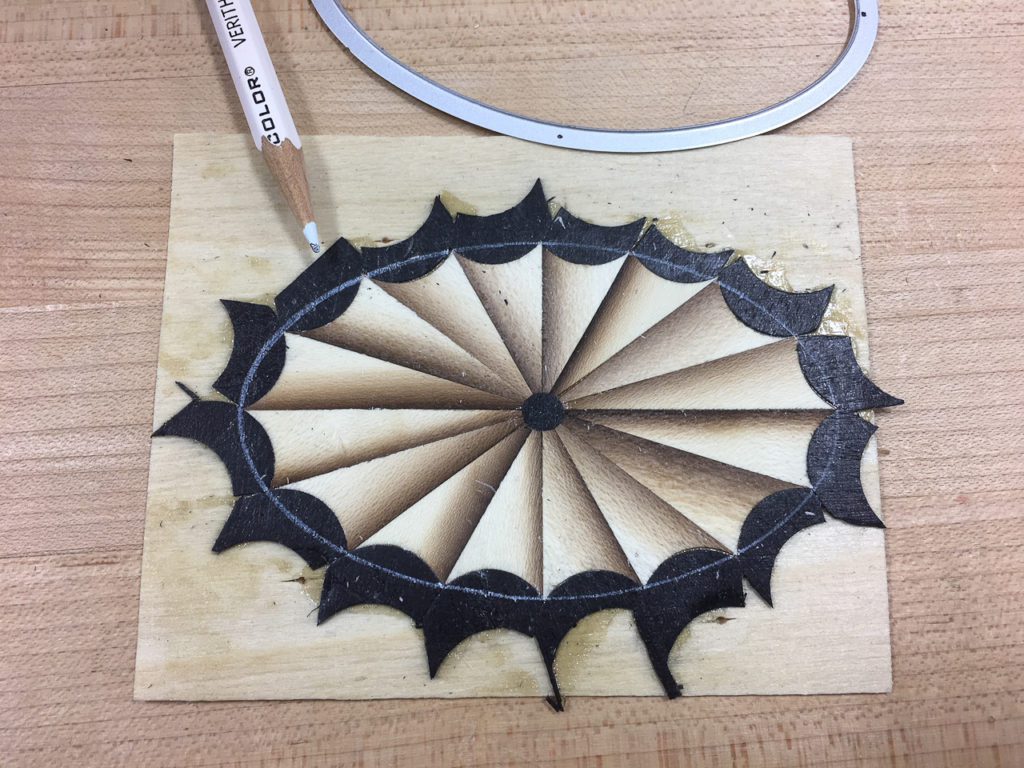
- Cut out the paterae on bandsaw using a fine blade cutting just up to the white pencil line.
- With 220 sandpaper and a block of wood, sand to white pencil marks. Hold the block perpendicular to the surface of the paterae and make curved strokes.
If you would like to learn more about inlay and veneer work please check out the classes at the Florida School of Woodwork.
This article was presented to the Florida Chapter of the Society of American Period Furniture Makers (SAPFM) on September 22, 2018.
© Joe Kunzman, all rights reserved