How to Make A Raised Frame and Panel Door
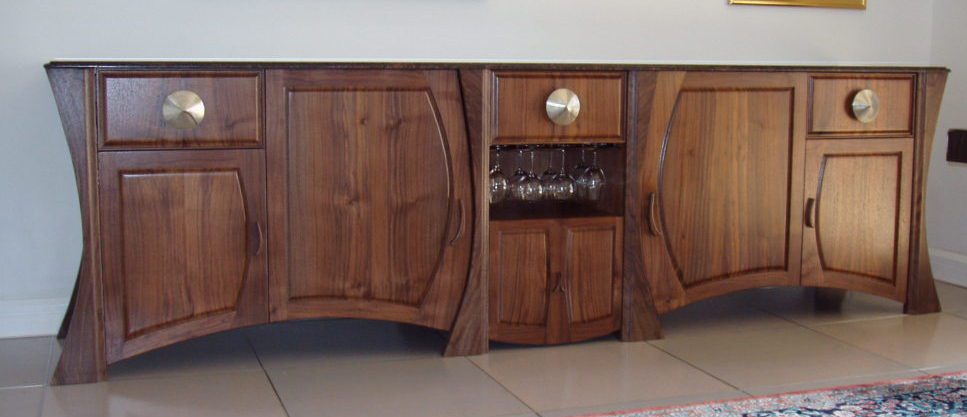
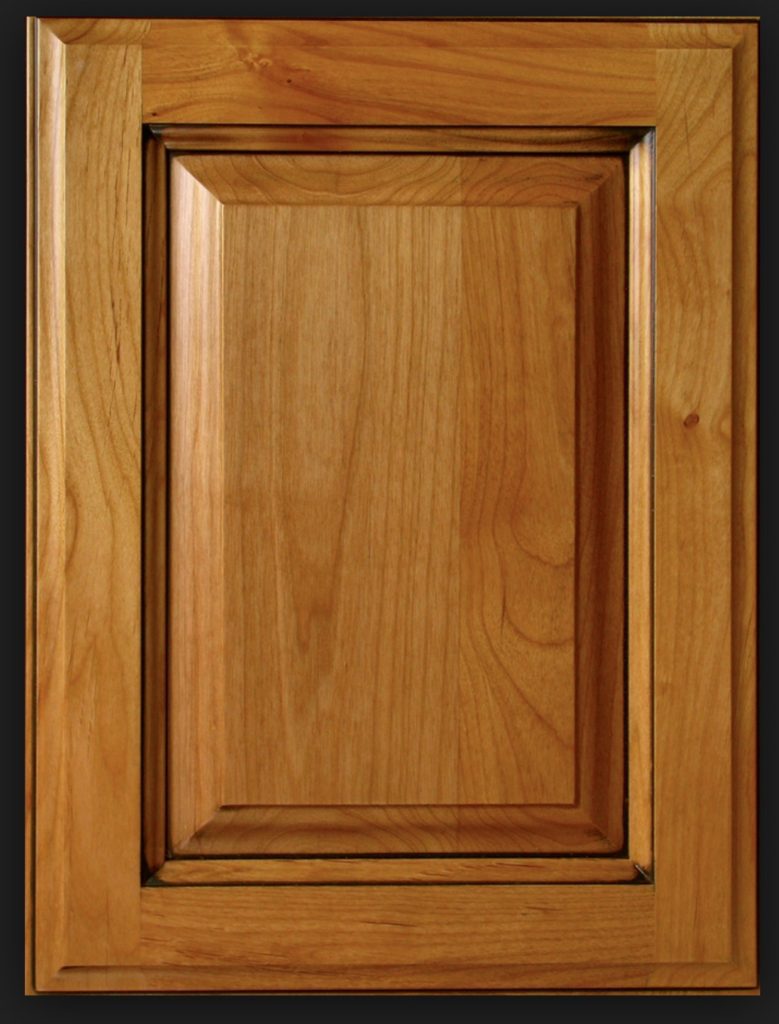
Cabinets usually need a door or two and deciding on the style of the door can be make or break the appearance of the piece. There are lots of different choices and lots of different hardware considerations, but one door style that makers come back to time and time again is the frame and panel door and particularly the raised panel door.
Frame and panel doors solve the problem of wood movement that can happen with wide wood doors and the raised panel gives it an elegant finished look.
This post will walk you though the steps to build a raised frame and panel door and if you’re interested you can sign up to the get excel spreadsheet that will help you do some of the basic calculations.
The Florida School of Woodwork offers classes in several different aspects of cabinet making and door making . Check out all of their classes at Florida School of Woodwork
The Parts of a Cabinet Door
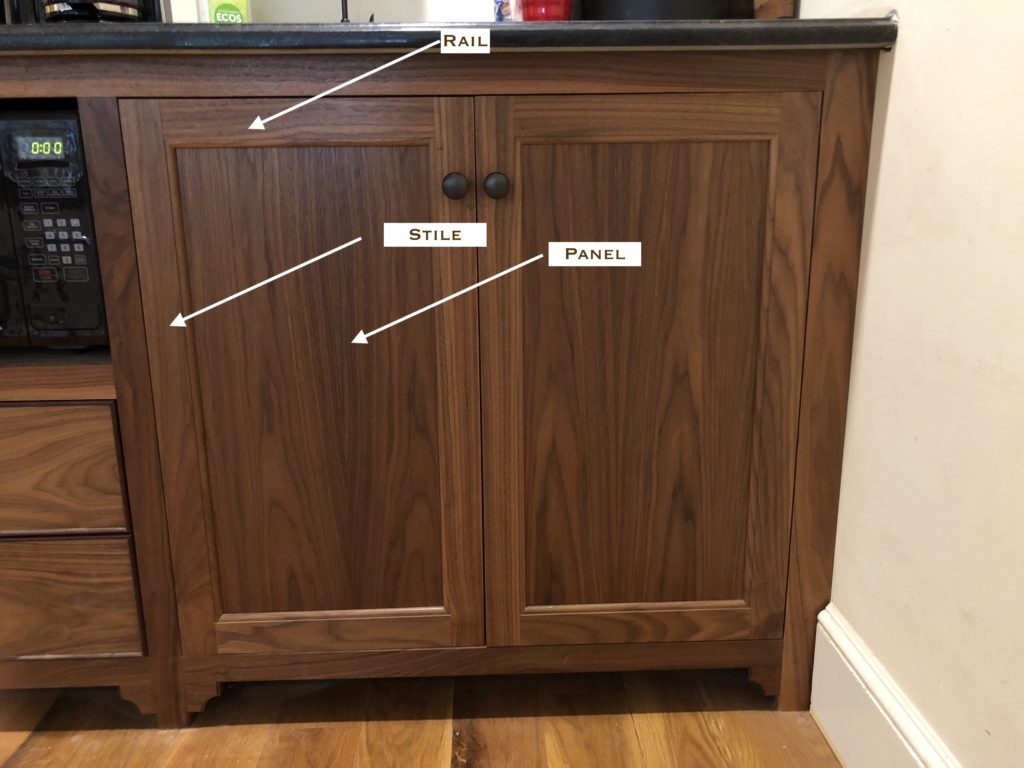
All raised panel doors are comprised of three components:
- Stiles – These are the vertical components. Two are required. They extend the full height of the door.
- Rails – These are the horizontal components. Two are required. They fit between the stiles.
- Panels – This is the field (center) of the door. One is required.
Additional components can be added if the door is large, or for esthetic reasons.
The rails and stiles form the frame around the panel. The panel floats in a groove cut into the inside of the rails and stiles. During assembly, the rails and stile are glued together, but no glue is applied to the panel since it needs to be able to expand and contract freely with seasonal fluctuations in temperature and humidity. The photo below isn’t a raised panel but it give you a sense of the door parts.
To make these raised frame and panels you will need a door-making cutter set. Your choice of cutters will depend on whether you own a router table or a shaper.
Not sure what a shaper is? Check out this description in Wikipedia. What is a Shaper
What are the parts of a door cutter set
A basic door cutter set consists of three cutters.
- A “positive” profile cutter for the inside of all rails and stiles. There are many to choose from. This cutter will cut the decorative edge visible on the door front and it will cut the groove needed for the door panel
- A “negative” profile cutter which is the mirror image of the first cutter, above. This cutter is used on the ends of the rails to cut the mating profile.
- A raised panel cutter. This can be a very large cutter due to the size of most raised panel profiles. Mine is 5” in diameter! It can be a bit intimidating when spinning at 12,000 RPM (shaper) or 20,000+ RPM (router). Keep all the safety guards on your machine. Due to the limitations of some routers, router bit manufacturers have produced raised panel cutters that require the panel be vertical when pushed past the cutter. This allows them to make the bit smaller and lighter.
- Some door cutter sets also come with an outside edge profile bit. This bit is used on both the doors and drawer fronts of a cabinet.
The photo below is of a cutter set from InfinityTools.com, they offer a nice range of different styles.

What size should you cut your door parts?
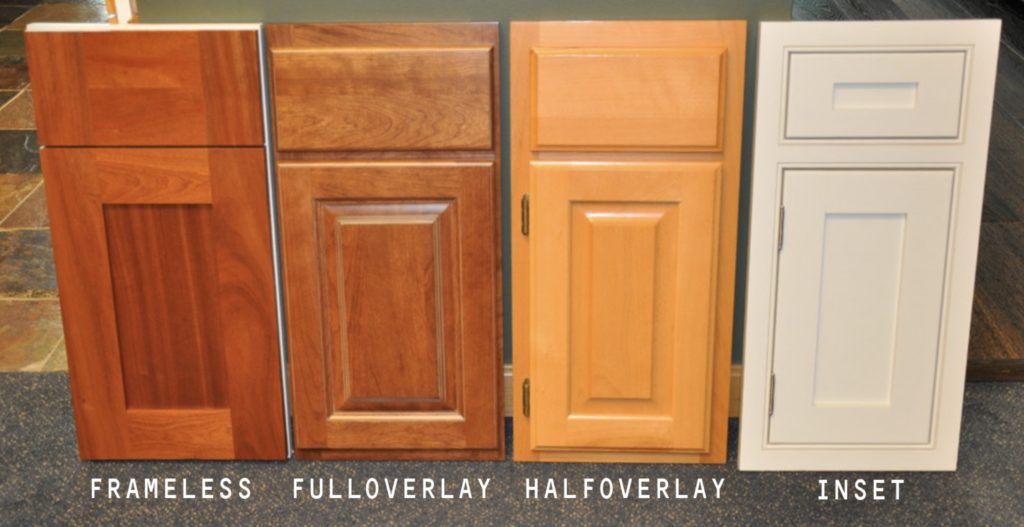
Next, you must decide if your door will be mounted either: flush, full-overlap, or half-overlap to the cabinet face. This decision is as much as aesthetic one and will determined by the aspects of the piece of furniture you are building.
Doors are generally built after the carcass is assembled.
The rough opening of the door opening needs to be measured.
Many kitchen cabinets use full-overlap but when making a furniture piece the style can vary widely. When overlapping, 1/4″ will need to be added to the face frame’s rough opening dimensions on all sides to arrive at the overall door size. For double doors, the 1/4″ add-on to the rough opening is applied to both doors taken as a whole.
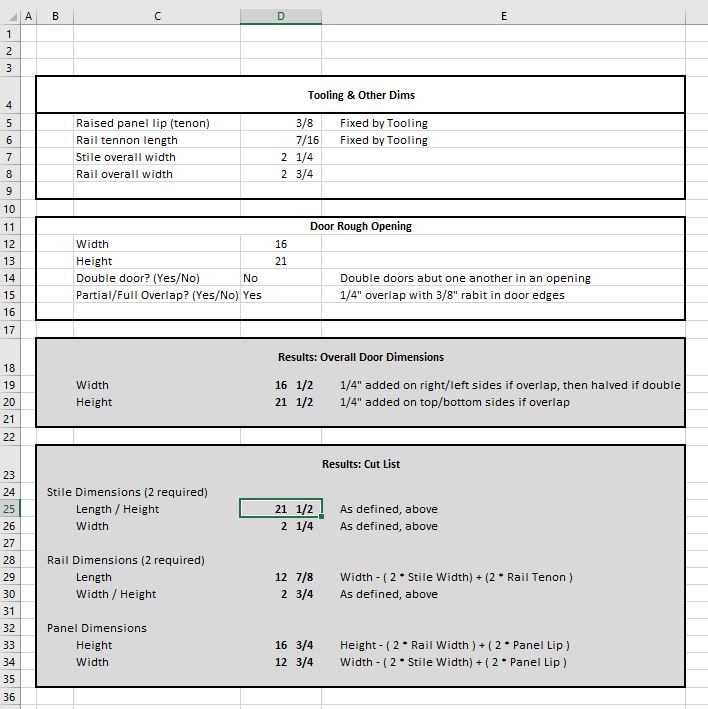
You can use a simple Excel spreadsheet to calculate all the dimensions. You input the rough openings, overlap stile and desired width of the rails and stiles and from there it calculates a cutting list.
Want a copy of the Spreadsheet?
Choose the download link below and we’ll email it to you AND a few special tips from the School of Woodwork!

How to Make the Parts of a Cabinet Door
- Mill the stock to 3/4″ thickness for the stiles and rails, and to 5/8” thickness for the panel. This is what most door cutter sets are designed for.
- Rip the rails and stiles to width per the cut list.
- Crosscut them to length leaving them somewhat oversized. You will trim them flush in later operations.
- The thinner dimension of the panel is required because it is set back 1/8” from the rear of these components. This results in the face of the panel flush with the face of the rails and stiles after assembly.
- Cut the door panel to size, per the cut list.
- Setup the positive cutter in shaper to profile the inside edges of the rails and stiles.
- Adjust height of the cutter’s slot segment 1/8” off the shaper table surface.
- Adjusted the depth of cut for a full reveal of the quarter round, but no more than is needed to maintain the full width of the stock. (For my positive cutter this was not an option. To achieve the full quarter-round on profile I had set the depth to remove about 1/8” of stock from the width. I compensated by ripping the rail stock 1/8” oversize, in the step above.) Once you are satisfied with your set up, then cut the interior sides of all the rails and stiles. Cut only one long edge on each.
TEST everything.
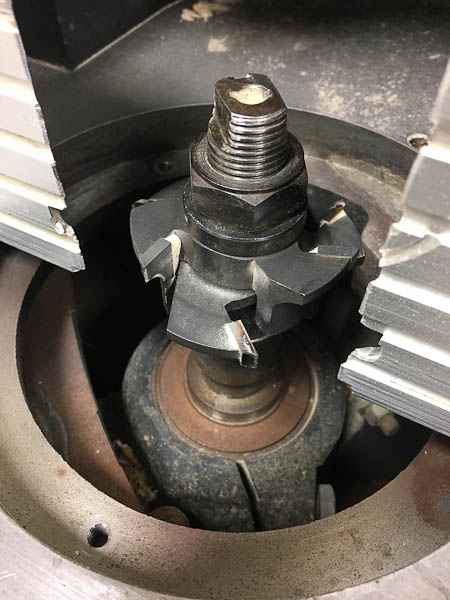
Figure 4: Positive cutter in shaper |
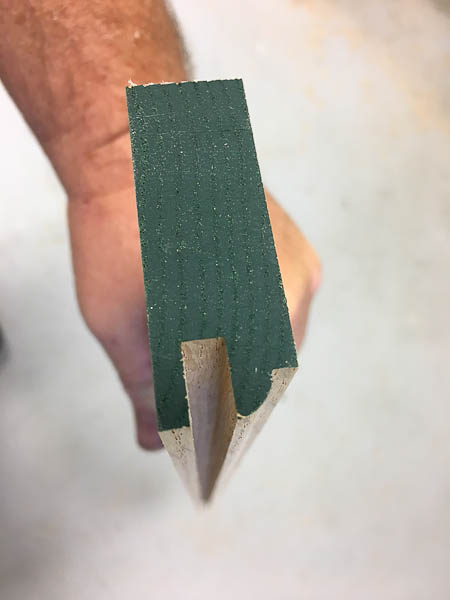 Figure 5: Profile inside of stiles and rails Figure 5: Profile inside of stiles and rails |
Setup the “negative” cutter in the shaper to profile the ends of the rails. Start by cutting two backer boards, used to eliminate tear out. Both will be made from 3/4″ thick stock ripped to 1”. The length should approximate the rail length. Next, cut the “negative” profile into one.
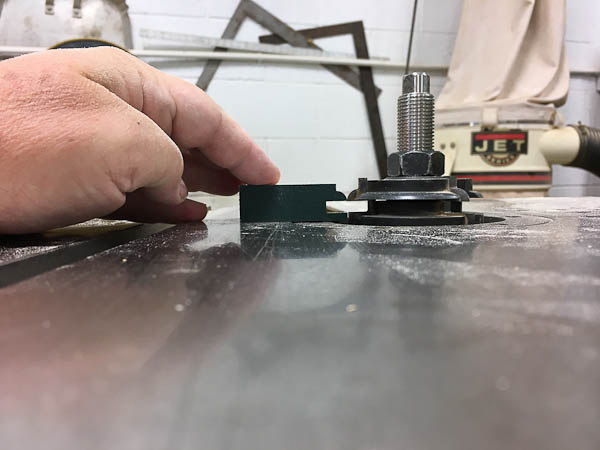 Figure 6: Align “Negative” cutter to cut “waste” backer Figure 6: Align “Negative” cutter to cut “waste” backer |
 |
A coping sled will be required for cuts at the ends of the rails. You can buy these (check out InfinityTools.com) or you can make one. This coping sled has 2 clamps to hold the sacrificial backer, and 1 clamp to hold the work piece. With one of the rails mounted in the coping sled, raise the height of the “negative” cutter to match the “positive” profile. Now you’re ready to make the “backward” cut on the end of each rail. Use the sacrificial backer board to eliminate tear out.
Adjust the cutter height up or down so that the tongue and groove match. Cut deep enough that a full tenon is formed.
 Figure 8: Rail with “waste” backer in coping sled Figure 8: Rail with “waste” backer in coping sled |
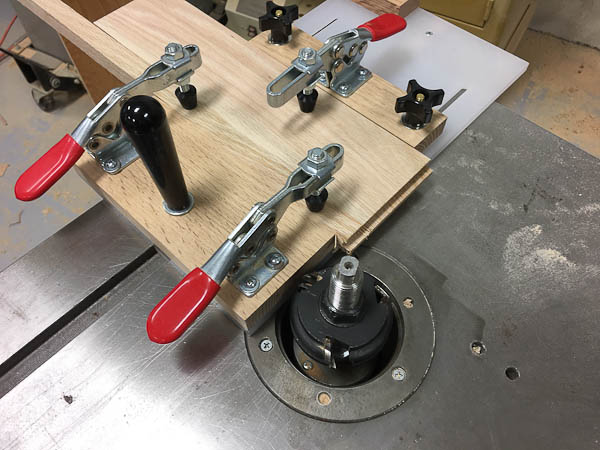 Figure 9: Finished “backward” cut Figure 9: Finished “backward” cut |
Switch over to the plain sacrificial backer in the coping sled. Mount a scrap piece of rail stock in the coping sled and make a cut. Remove the scrap piece, but do not move the sacrificial backer, as this will be your reference point. Cut all rails to final length on the table saw. Mount each rail on the coping sled; aligning the freshly cut end with the end of the sacrificial backer. This will ensure an exact length. Make all “forward” cuts with this setup being certain to never move the sacrificial backer from its initial alignment.
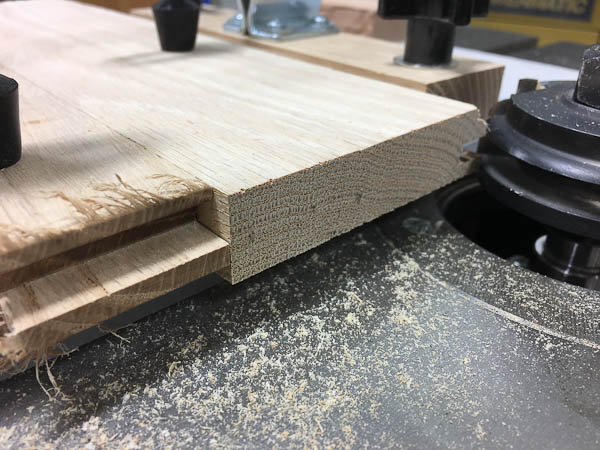
Figure 10: Alignment of forward cut |
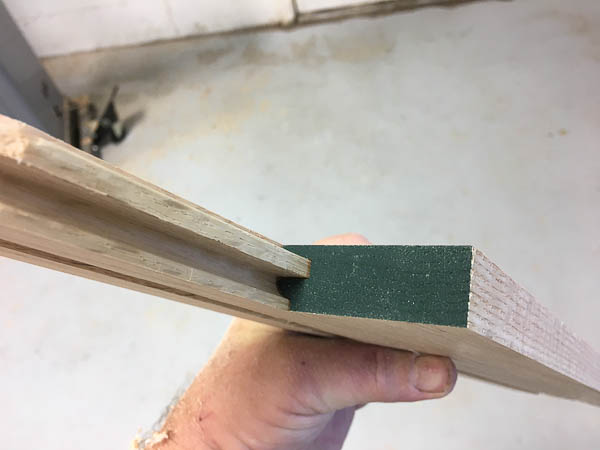
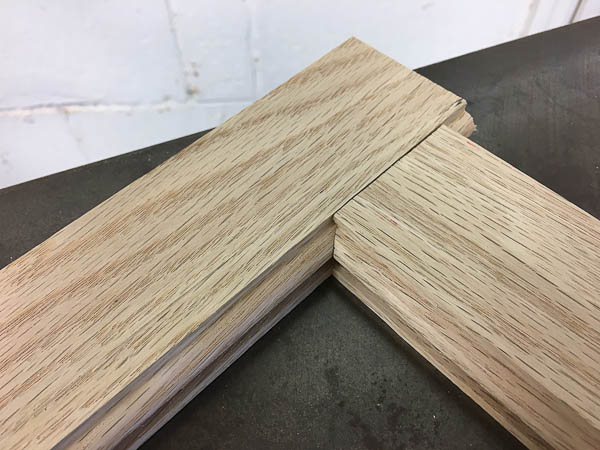 Figure 11:Dry Fit Figure 11:Dry Fit |
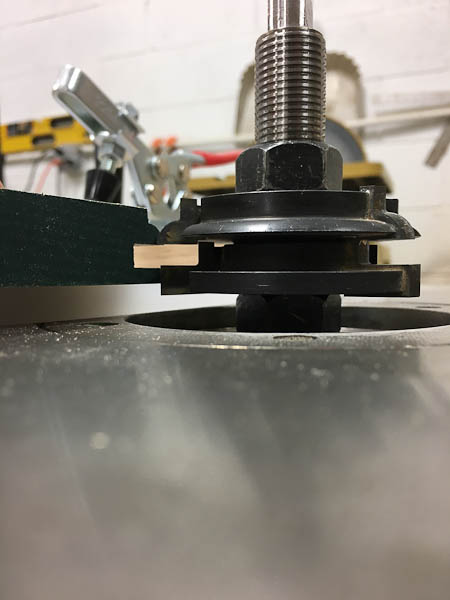 Figure 12: Align “Negative” cutter to cut rail end Figure 12: Align “Negative” cutter to cut rail end |
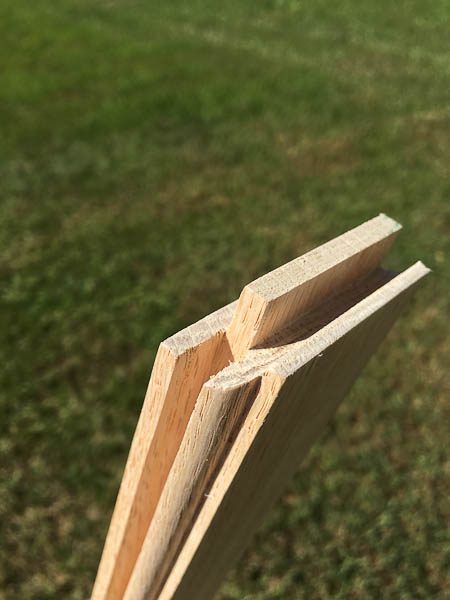 Figure 13: Finished rail Figure 13: Finished rail |
Use the raised panel cutter with a bearing on all 4 sides of the panel. This is usually done in several passes, as a lot of material is being removed. Make sure to cut the end grain first because the resulting tear out will then be cut away when the long grain is cut.
For the final cut, adjust the cutter to form an edge that will fit into the groove cut in the rails and stiles in the prior step. It should fit snugly (without using force) so the panel doesn’t rattle after assembly. (Note: You might want to take a look at “space balls” if you’ve got a rattle….just google them)
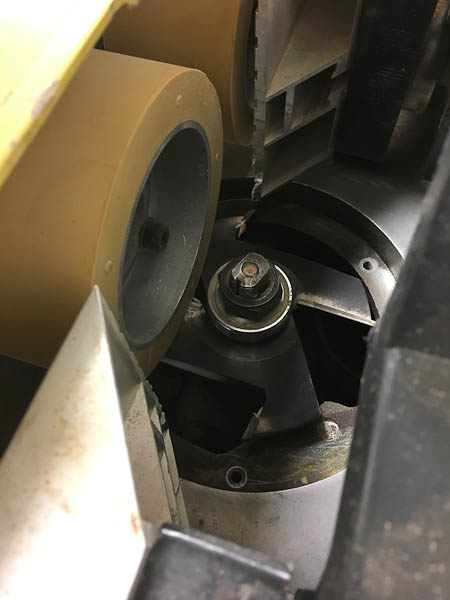 Figure 14: Raised panel cutter in shaper Figure 14: Raised panel cutter in shaper |
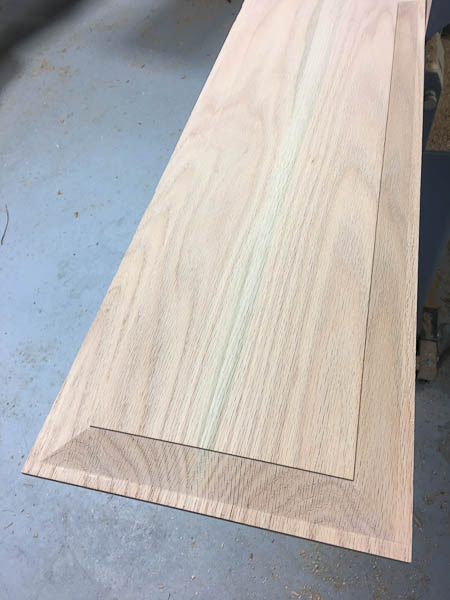 Figure 15: Finished raised panel Figure 15: Finished raised panel |
How to Assemble Raised Panel Cabinet Doors
If you intend to stain or dye your cabinet, it is important that you do so the door panel prior to assembly, since the final finishing will not penetrate this area. When the panel shrinks, unstained wood will be exposed. If you don’t plan on dying or staining we recommend that you finish – apply the clear coat – prior to assembly.
This is also a good time to sand the inside profiles of the rails and stiles, sand the panel, and seal the end grain of the panels with shellac.
When assembling the components, only apply glue to the rail ends and the mating areas on the stiles. Avoid glue getting glue anywhere on the edges of the panel, it must be allowed to float.
You may have noticed that the panel lip does not contact the bottom of the grooves in the rails and stiles. This is by design. Room must be left for expansion.
Clamp the assembly at each end over the rails. Additional clamping of two temporary braces, to keep the door flat, maybe required. Check the assembly for squareness by taking diagonal measurements from the rear of the panel at the inside edges of the rails and stiles. Adjust until they match. Also, make sure the edges of the rails are perpendicular and not pressed tightly against the panel.
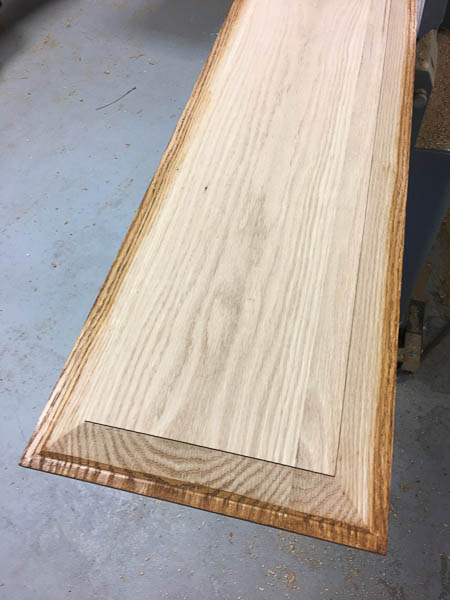 Figure 16: Edges stained Figure 16: Edges stained |
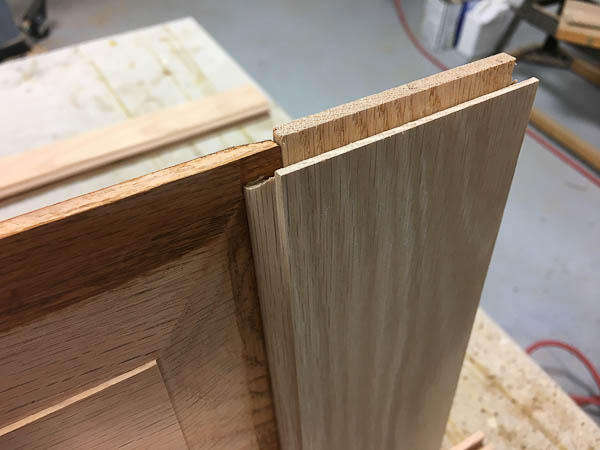 Figure 17: Dry Fit Figure 17: Dry Fit |
|
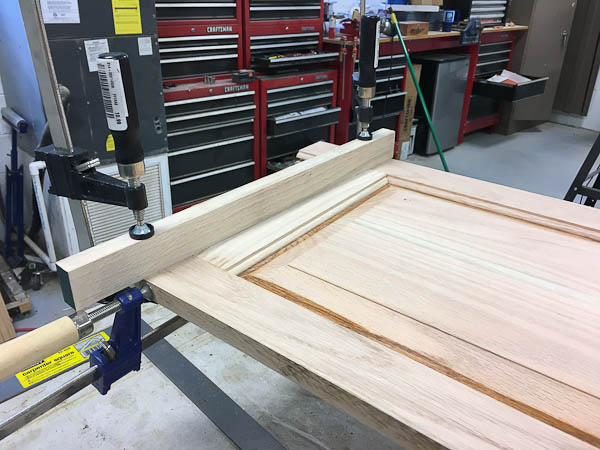 Figure 18: Glue-Up Figure 18: Glue-Up |
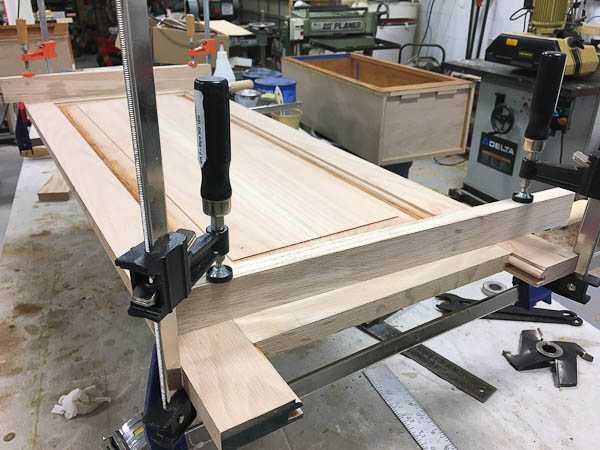 Figure 19: Glue-Up Figure 19: Glue-Up |
Finishing up
After the assembly dries trim the door to final size making sure you trim equal amounts from opposite sides.
If the door is a half-overlap, cut a 3/8” by 3/8” rabbit on all rear edges. Since the door was oversized 1/4″ from the rough opening, the 3/8” rabbit will result in a 1/8” gap between the inside door edge and the rough opening to allow for the hinge hardware and avoid binding when the door is opened.
Some outside edge profile cutters combine the edge profile and rabbit into a single cutting operation.
A footnote on double doors
Some doors are made in pairs and installed in face frames with no divider between them. These are called double doors and allow for a wider opening than a single door. When making double doors with a full or half overlap, the 1/4″ add-on to the rough opening is applied to both doors taken as a whole. Said differently, the 1/4″ is not applied to the abutting edges. Also, if making a partial overlap door, the 3/8” by 3/8” rabbit is not cut into the abutting edges either.
© Joe Kunzman, all rights reserved