
Introduction to Veneer
What is Wood Veneer?
Wood veneer is a thin layer of wood that is usually applied over another material called a substrate. Woodworkers use these thin sheets of wood for any number of reasons – the wood is rare and expensive, the shape and/or scale of the project is not feasible in solid wood, pattern, color and grain matching are important for the aesthics of the piece. Veneer can also be used for:
- Inlay – This is the process of using veneer to make lines, bands and small motifs into solid wood
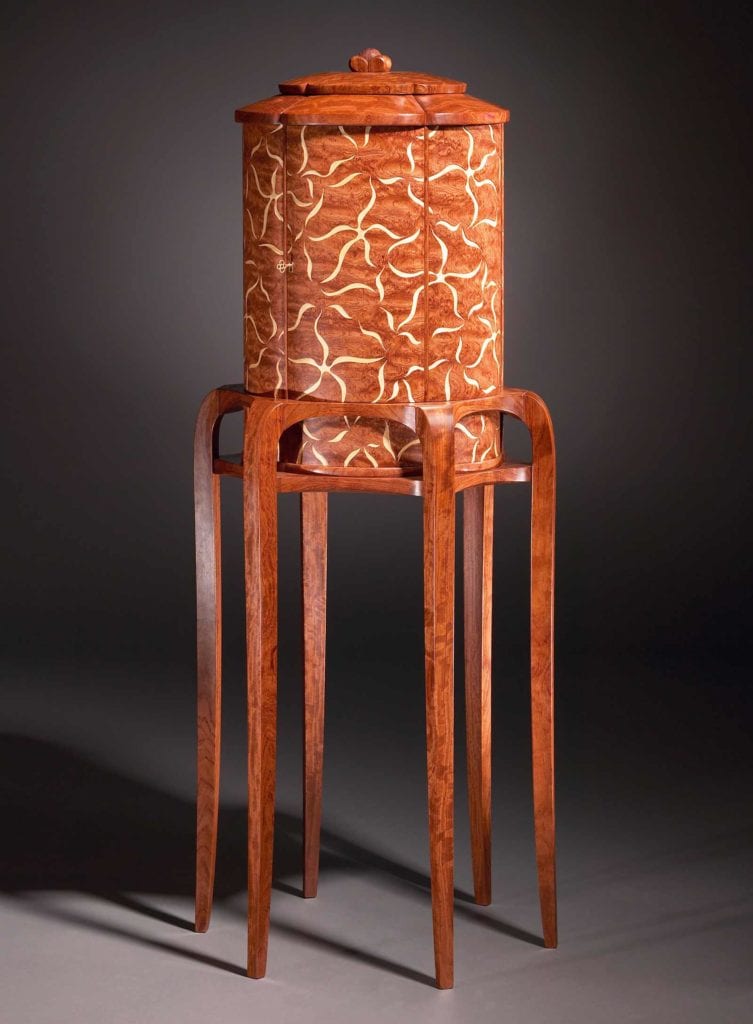
- Marquetry – This is the art of cutting and assembling small pieces of veneer into pictures on a substrate
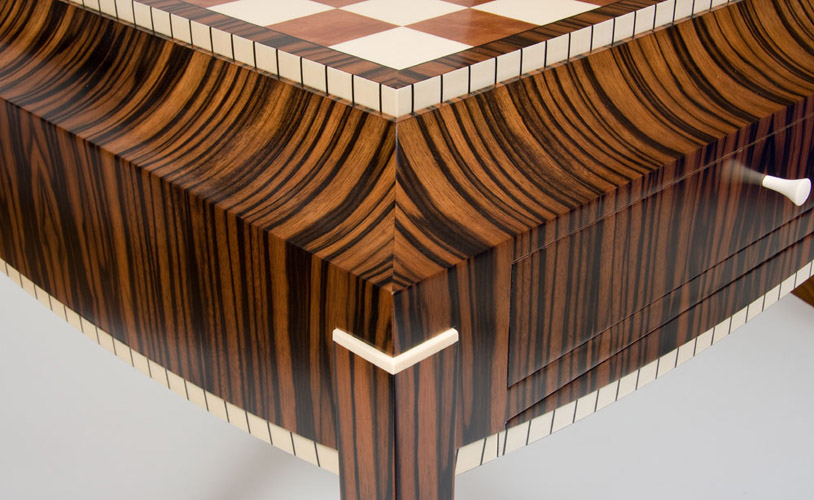
- Parquetry – Cutting pieces of veneer into geometric patterns – think of a chess board
What kinds of wood can be made into veneers?
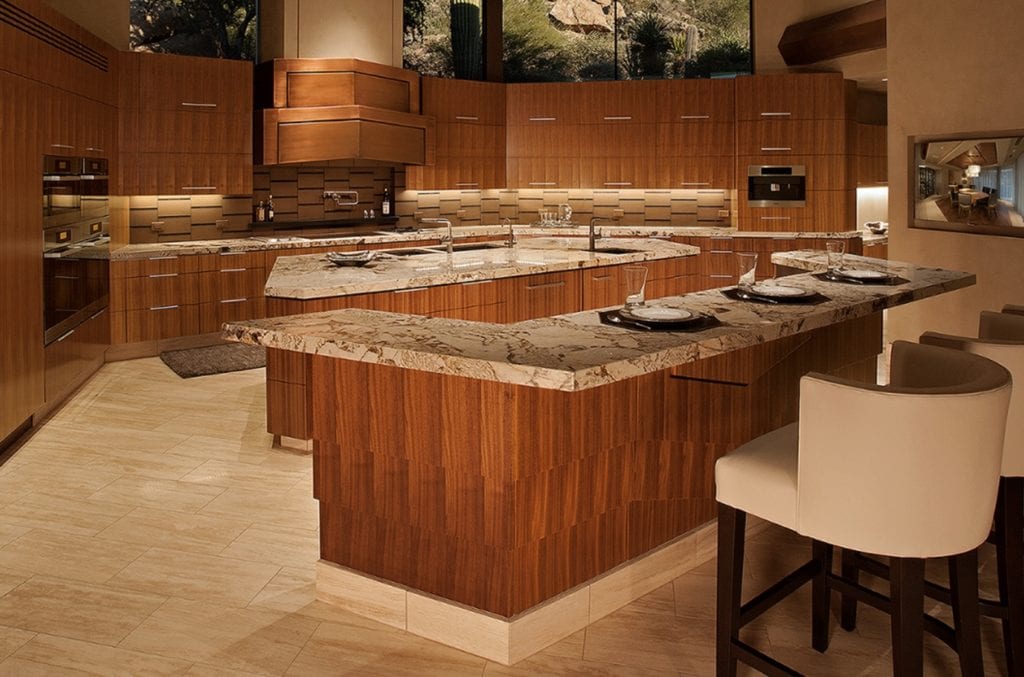
Any type of wood can be cut into veneers. Common woods such as oak, maple, birch, or cherry will be cut into veneers to be incorporated into commercial manufactured furniture.
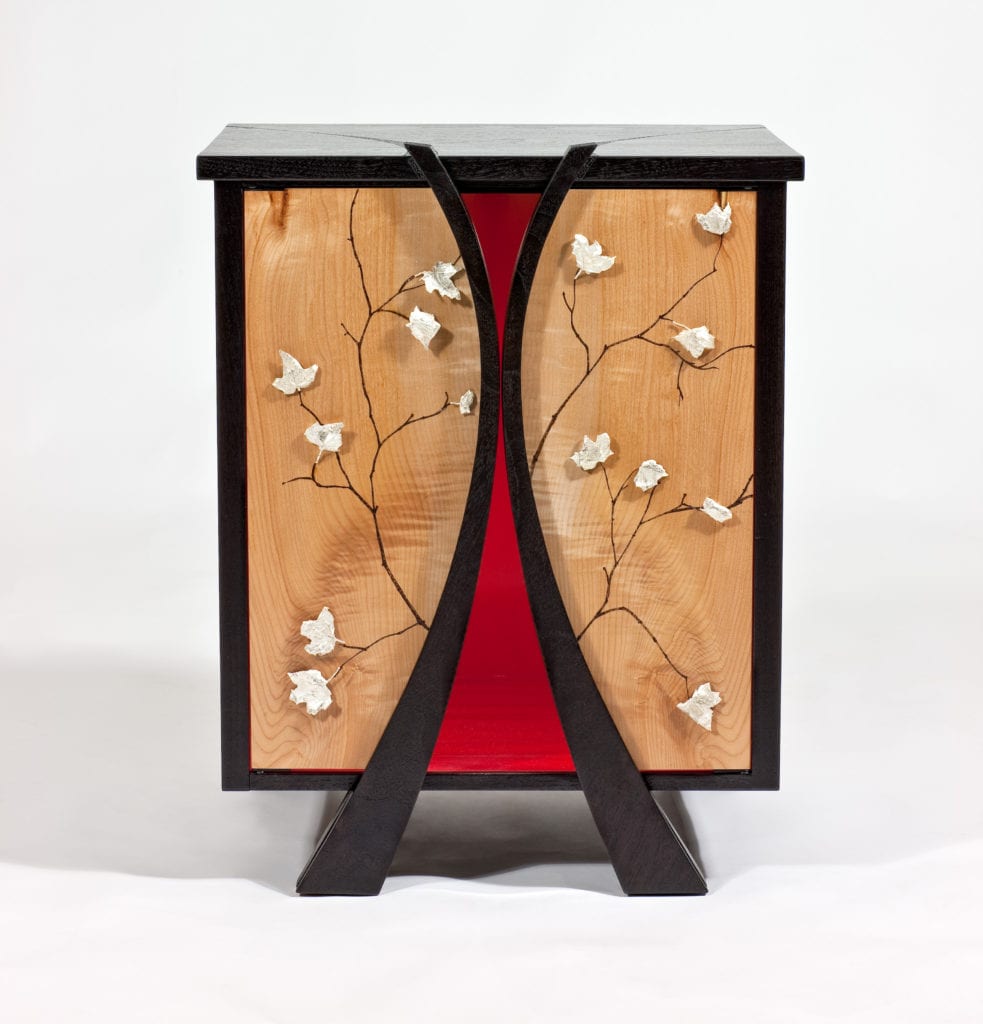
More expensive woods such as mahogany or figured wood will be sliced into veneers and used in higher end custom made furniture.
How is wood veneer made?
Veneer is made by cutting thin slices off a whole log to make a sheet of wood. There are several ways in which these sheets can be cut. The different kinds of cuts result in different patterns of grain.
There are three basic methods: Rotary cutting and Slicing, with a subset of Quarter sawn.
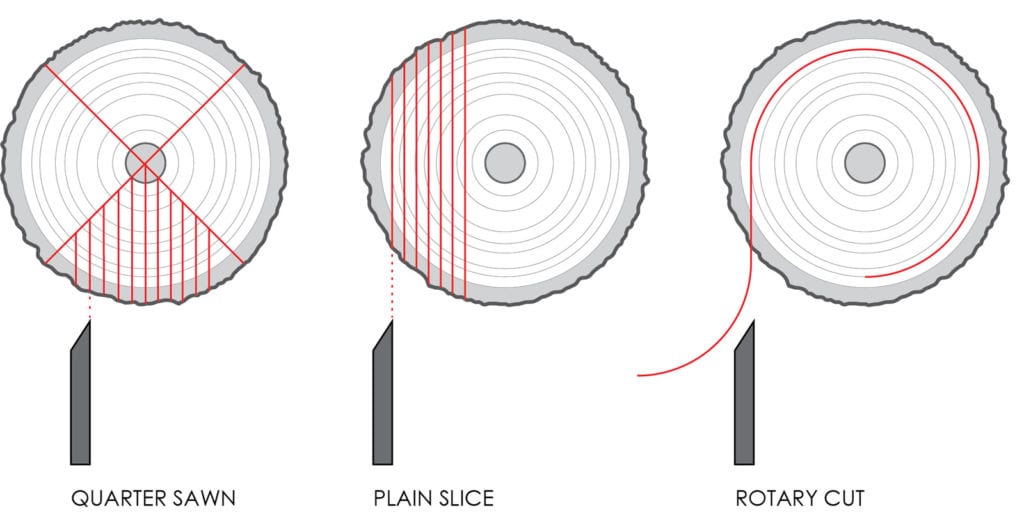
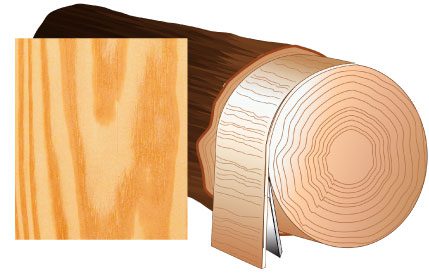
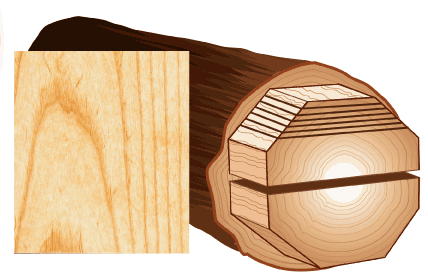
Rotary Cut
Rotary veneers are peeled from a log like paper coming off of a roll, though the veneers are not truly continuous. This method produces large pieces of veneer with very flat, random grain patterns.
As the wood is peeled from the outside to the center of the log it moves from sapwood to heartwood which can be very different in color. Heartwood and sapwood may be combined in one piece of veneer. The advantage of rotary veneers is that it is generally the least expensive cutting method, and can provide large pieces of veneer and “whole piece faces”. The disadvantage is that rotary veneers can have a bland appearance and may vary widely in color within the same panel though this can be specified out. Not all species of wood produce logs that can be rotary peeled and decorative softwoods are rarely rotary peeled.
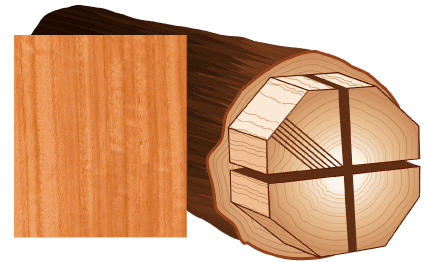
Sliced Cut
Sliced veneers are produced from a log that has been prepared by cutting it into “cants”, or large blocks. How these cants are cut and their orientation to the veneer knife will produce unique grain patterns from different wood species.
- PLAIN SLICED veneers are cut along a log’s growth rings and typically present a cathedral grain pattern and pieces of veneer or “flitches” 6″ to 12″ wide. Plain Slicing produces the highest yield and is generally the least expensive slicing method. Half Round produces a similar pattern and size.
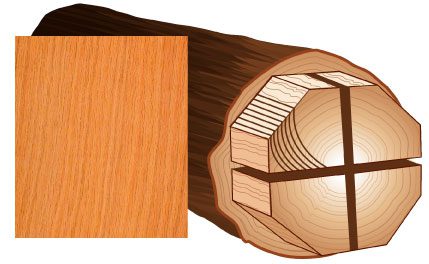
- QUARTER SLICED veneers are cut perpendicular to a log’s growth rings and generally produce straight grained veneers. In many species this will reveal decorative figure in the wood like flake patterns in white oak. Quarter slicing produces smaller veneer flitches and is more expensive.
- RIFT CUT is general reserved for oak and is intended to produce a straight grain without exposing the flake pattern. Rift cutting is at a tangent to a log’s growth rings.
How are wood veneers sold?
Veneers can be sold by:
- Individual pieces
- In sheets – veneer sheets are large pieces of veneer that are mechanically put together from smaller pieces. These types of sheets are usually made for application onto 4×8 sheets of MDF for example.
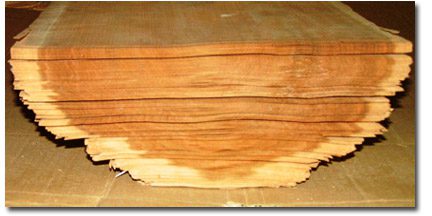
- As a flitch. A flitch of veneer is a pile of sliced veneer that is conserved in order. It’s like taking a tree trunk and slicing it up lengthwise. All the pieces are kept in order because this helps to keep the grain pattern similar from one piece to the next.
VENEER MATCHING
All veneers, except the rotary cut veneer, to have full sized panels must be assembled into large sheets or “spliced” together. This process is known as veneer matching, and different matches produce a specific pattern in the finished panel.
Here are some of the types of splicing that you will see:
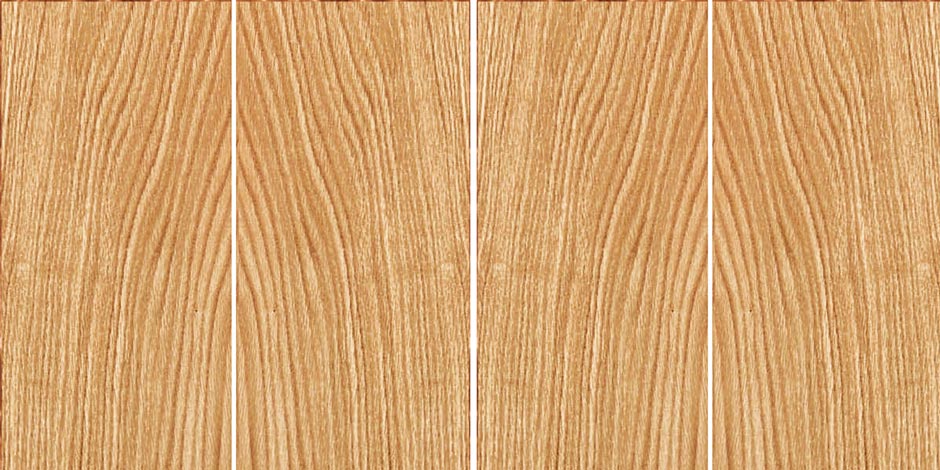
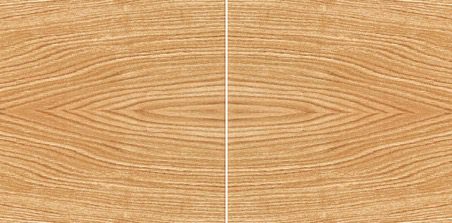
Book Match
Book matching is the most common technique and is often used with plain, quarter or rift sliced veneers. This occurs when consecutive leaves of veneer are flipped open facing each other like pages in a book. This creates a mirror image of the previous leaf. The symmetrical pattern accentuates the grain, figure, and decorative characteristics of the log. Book matching can create color variation and can produce alternating “tight” and “loose” faces that reflect light and accept stain differently – often producing a “barber pole” effect.
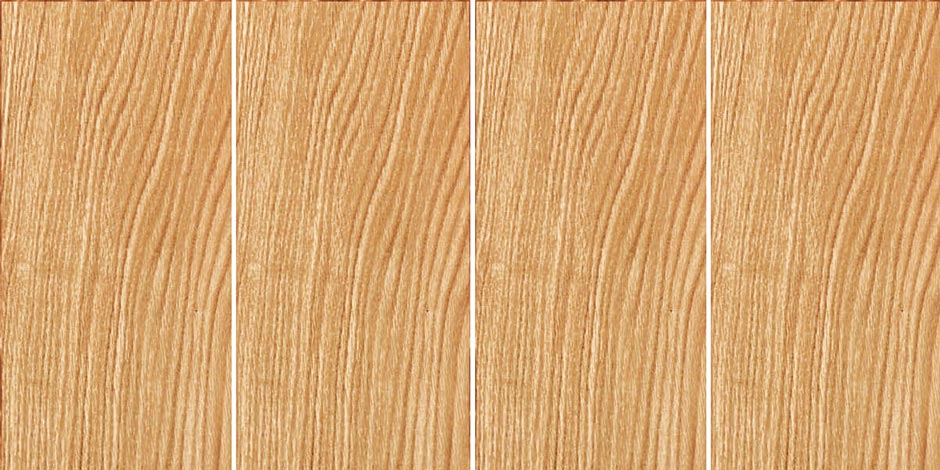
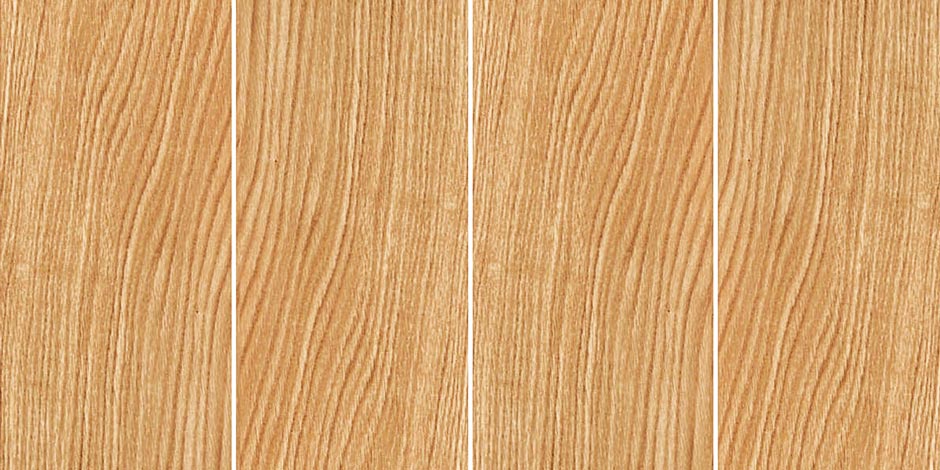
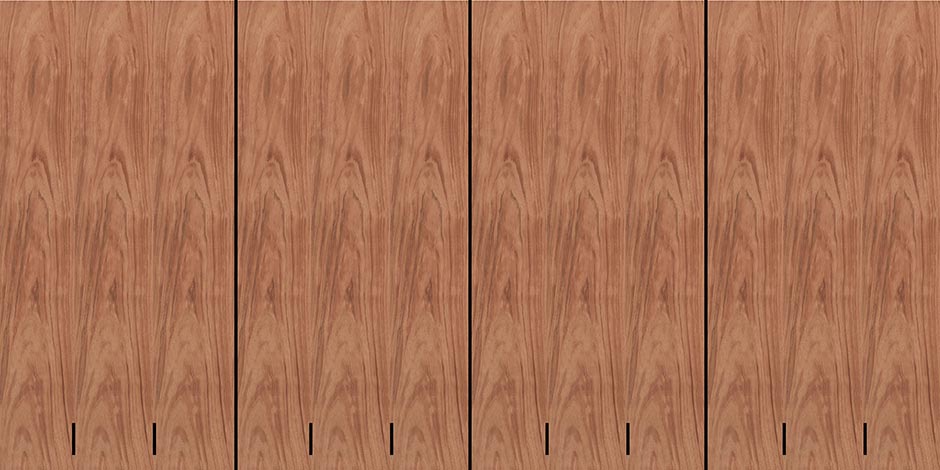
Slip Match
Consecutive leaves of veneer are slid or “slipped” across each other and joined side by side, like sliding a deck of cards and creates a repeating grain pattern across the panel. Slip matching is a common technique that is often used with quarter and rift cut veneer to provide a clean straight grain look. In veneers with a straighter grained the joints won’t be prominent, but some rotary cut veneers, especially those that include both heart and sap wood, can highlight the flitch joints.
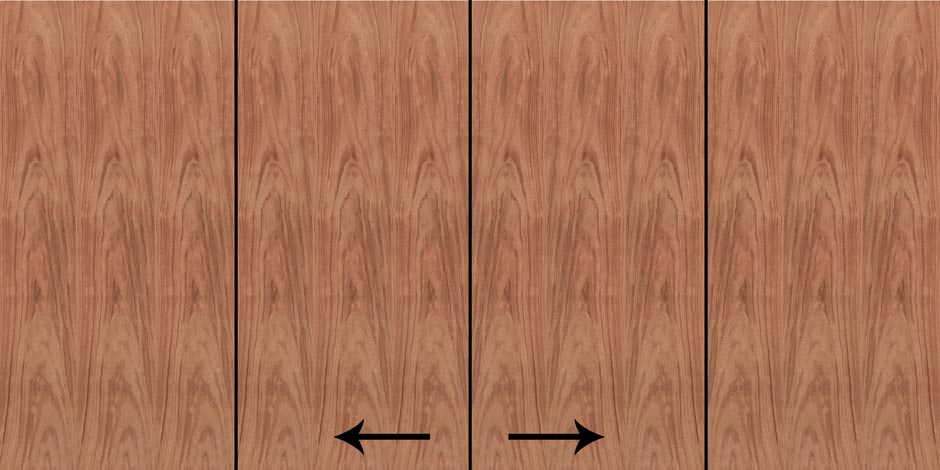
End Match
Two consecutive leaves of veneer are book matched and the next two are flipped, creating a four-piece end match (also called a book-and-butt match). End matching creates beautiful patterns and accentuates swirly grains and the irregular characteristics of veneer. This method makes good use of shorter veneer leaves and is often used with burls and crotches.
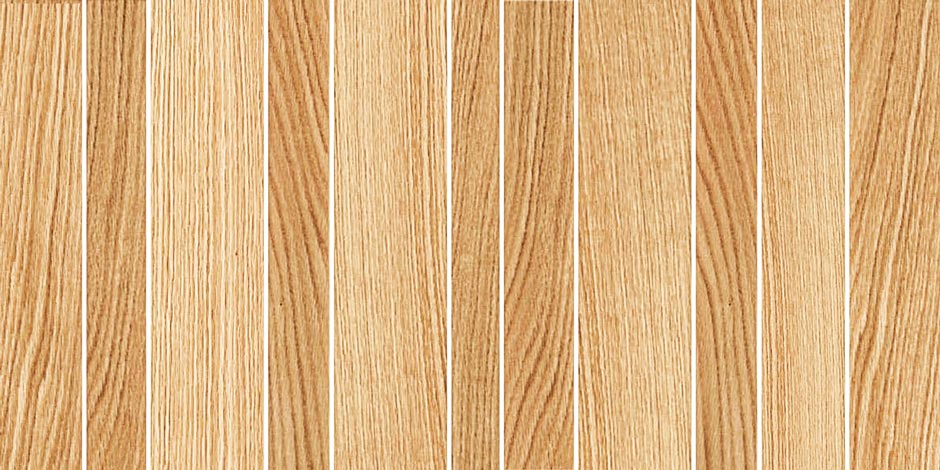
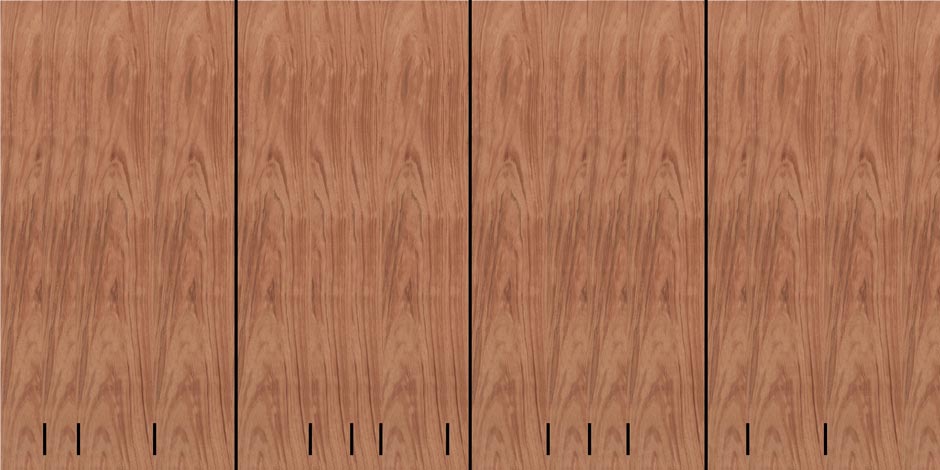
Reverse Slip Match
Alternating leaves of veneer are slipped across each other and every other leaf is flipped end to end. Reverse slip matching creates an alternating grain pattern that breaks the repetitive “marching” pattern of the traditional slip match. It balances the character of the veneer and is often used where curved shapes might cut off the grain in peculiar ways.
Random Match
Random Matching assembles veneer flitches without regard to grain pattern or color. Visual continuity is not guaranteed, though some species are naturally more uniform than others.
Panel Matching Methods
Once a sheet of veneer has been matched into a panel you can then match each of the panels to form a pattern.
Center
All veneer leaves are trimmed to the same size and applied to the panel in patterns using an even number of leaves. Horizontal symmetry results from centering the veneer face on the panel and then trimming the edge. Center matching creates the most symmetrical pattern in architectural paneling and is often considered the most pleasing match. It is typically more expensive as the trimming and centering requires more veneer than other panel matching techniques. Panels may be sequenced and numbered for adjacent use.
Balance
The width of each veneer leaf used is the same giving a more symmetrical look than running matched panels. In balance panel matching the face is not center balanced and an odd or even number of leaves may be used. Grain may change between panels over long runs as the characteristics of the veneer change through the use of the flitch. Panels may be sequenced and numbered for adjacent use.
Running
A natural change in the veneer leaf width is common and acceptable and each veneer face is assembled from as many veneer leaves as necessary producing a non-symmetrical look. The pattern starts on one side of the panel and leaves are added next to each other until the edge of the panel is reached. Each veneer face is assembled from as many leaves as necessary and horizontal grains are generally not matched.
What is the Thickness of Veneers
Different mills produce veneers of varying thicknesses but it is typically 1/16th of an inch thick, ranging all the way down to 1/64th of an inch thick. The thinnest veneers are used in manufactured inexpensive furniture. On the other hand, woodworkers use the thicker veneers to make higher grade custom furniture pieces.
Mills based in the US will generally cut to the following thickness:
- rotary cut range between 0.125” (1/8”) and 0.026” (1/38”)
- plain sliced are generally 0.028” (1/36”) or 0.024” (1/42”)
- rift cut or quarter-sliced veneers thicknesses range between 0.063” (1/16”) to 0.020” (1/50”)
Veneer Substrates
Veneers must be glued to something – that’s a substrate!
Technically, any smooth surface that can be glued to can be a substrate for a wood veneer. The substrate is the material that the veneer is glued on to. The best substrate is the one that is the most stable. This means that it does not expand and contract with temperature or moisture and is as flat as possible.
In general, common veneer substrates are:
- MDF – is smooth, flat, and incredibly stable. It is also relatively inexpensive and consistent in its makeup. Its surface readily accepts being glued to veneer
- Plywood – Although plywood is not as good a choice as MDF it can be used as well. If weight is an issue, for example on large doors, baltic birch plywood can be used instead of the heavier MDF. However, plywood can warp, especially if stored improperly, and may have voids within its core that you may not see until it is cut
- Particle board – Particle board is also a good substrate. However, if it has a melamine surface a proper glue bond cannot be applied to this surface. It will need to be sanded first.
- or other less expensive pieces of wood such as poplar or pine.
In the next post we’ll talk more about how to do veneering and some of the techniques involved.
If you are interested in learning more about veneer and learning how to veneer furniture consider taking a veneering class at the Florida School of Woodwork.
The Florida School of Woodwork provides weekend, week long and month long classes in Turning, Carving and Furniture Making.